


El ultimo dia yea! Como les fue de fin de semana? El mio estubo muy ocupado, no termine mi camino de mesa sino hasta hace unos minutos. Es dificil con tres pequenas en casa. Cuando pienzo en que algo me tomara una hora termina siendo tres o cuatro. En fin eso es la maternidad y no la cambio por nada.
 At this moment we are done with our quilting.The picture above is about finishing the edge margin.
Para este momento ya terminamos de acolchar. La foto de arriba es de cuando terminaba la orilla del segundo margen.
 Now is time to trim the excess batting and backing. I keep thescraps to use as fillers.
Ahora es momento de cortar el relleno y la tela trasera. Guardo los retazos para ocuparlos despues como relleno
I will just show you a trick of how to make the bias tape.
Solo les mostrare un tip para hacer el bies.
 Cut your pieces 2 1/2"and sew them right sides together, press and do not forget to open press the seams. I did use 3 strips. I just realize we did not needed so much of this material but you can always use it for the backing I will change the amounts later.
Cortar las piezas a 5.4 cm de ancho coser con la parte derecha juntas, planchar y no olvidar planchar las costuras hacia afuera.. Yo use 3 tiras, y ahora me he dado cuenta de que no se necesitaba mucho de esta tela en fin tendre que cambiar las cantidades.
 Fold in a half with your hand.
Doblar a la mitad con la mano.
 Now put a pin on your pressing table pinned a little bit on the bottom croos to the 1 1/4" space and pin again like the picture above.
Ahora poner un alfiler largo entre el bies 3.2 cm como se muestra en la foto de arriba y asi pasara el bien doblandose facilmente.
 Place the iron after the pin and leave enough material so you can pull the bias on the right side (if you are right hand sided). The bias tape will fold with no effort and you will be done in no time.
Poner la plancha despues del alfiler y dejar suficiente tela para poder empujar la tela del otro lado si son diestras. El bies se doblara automaticamente y sin ningun esfuerzo y terminaran rapidisimo.
 Ready to add the bias. Here is an excellent tutorial.
Listas para poner el bies. Aqui pueden encontrar un tutorial excelente.
 Done!
Done!Listas hemos terminado!
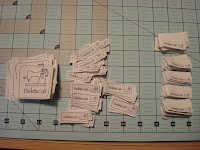
 Do not forget to label it!
No se les olvide firmarlo!
 I hope you like this tutorial, It was fun to make it together. I hope you got something useful for your crafting. The next post will be a series of seven posts showing you a project Darlette made for mom. I hope you can visit us. 'till then...
Espero que les haya gustado el tutorial, fue divertido hacerlo juntas. Espero que hayan encontrado alguna nueva forma de mejorar sus acolchados. La siguiente entrada empezaremos una serie de siete entradas mostrando un projecto que Darlette hizo para mama. Espero que nos visiten. Hasta en tonces...
Happy quilting
Erika


1 comment:
Oh, I loveee these!!! I love candy corn!! (not to eat, but just as a design!! I still have and love the halloween bag you made Kai!!)
Post a Comment