


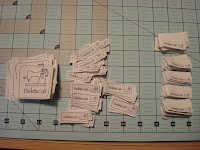


Tengo estos dos aparatitos para hacer bies. Funcionan bien (prefiero el rosa) pero se limitan al tamaño que pueden hacer (18mm y 25mm). Un dia una amiga me enseno como hacer el bies sin ninguno de estos aparatitos.
NOTE; this is the way I learned how to do it (I am self thought). You may have a better way to do it.
NOTA: esta es la forma en la que yo hago el bies (aprendí solita). Talvez tu tengas una mejor forma de hacerlo.
First of all you need to calculate how much bias you’ll need. Measure the perimeter of your quilt (each size) so if you quilt is 60” x 70” you will add 60 + 60 + 70 + 70 = 260” add 10” for a total of 270” that will help to sew it on the quilt.
To calculate how much fabric you’ll need I calculate the following:
Considering the width of fabric as 42” or 110cm and the width of the desired bias (in this case 1 ¾ this is the width I usually do my bias) I divide 270/42 It will give me how many strips I’ll need for a total of 6.42 ~ 7 strips times the width of the bias (1.75) = 12.25” Rounding up we’ll need 13” in other words:
Sides of quilt A+B+C+D= E Total perimeter of quilt
E+ 10= F Total inches of bias needed
F/42 (width of fabric) = G Number of strips
G*(width of bias strip) = inches of fabric you need
Lo primero que necesitas es calcular cuanto bies necesitas. Mide el perímetro de tu acolchado (cada lado). Si tu acolchado mide 150 cm por 180 cm vas a sumar 150 + 150+ 180+180= 660 cm agrega 25 cm mas para un total de 685 cm esos 25 cm te ayudaran a terminar de agregar el bies al acolchado.
Pata calcular cuanta tela necesitamos vamos a calcular lo siguiente:
Considerando que la tela mide 110 cm de ancho y el ancho del bies 4.5 cm (este es el ancho que yo normalmente utilizo) dividimos 685/110 que nos dara la cantidad de tiritas que es 6.22 lo redondeamos a 7 tiritas por el ancho de las tiritas (4.5cm) = 31.5cm redondeado 32cm.

So with your measurements done, cut the strips in my case 1 ¾. Sew all you pieces on the width right sides together and press open the seams. (I do this to diminish bulk).
Con todas las medidas calculadas, cortamos tiras de 4.5 cm (en mi caso) coser las tiras a de la parte delgada con los derechos juntos y planchar las puntadas abiertas (esto es para que no tengamos mucho bulto)

Next finger press on half just the first few inches.
Despues con las uñas marcar la tela a la mitad.

Press the fold.
Planchar el doblez (unos 10 cm)

Open and again fold it the edges towards the middle.
Abrir otra vez, doblar la tela hacia el centro por los dos lados.

And press, this is just to the first few inches
Planchar, solo unos cuantos cm.

First on your ironing table (I cannot do this on my small Teflon cover tableL) pin from edge to edge as shown.
En el burro de lanchar (o tabla) Pinchar como se puestra en la foto justo a la orilla del bies.

Make sure it does not have room to make the bias wider (I hope the pictures are self explanatory
Y Pinchar a la otra orilla del bies asegurarse de que no sea mas ancho para que el bies sea uniforme todo lo ancho. (espero que las fotos sean mas explicitas que mi explicación)

Pull just enough tape to have the iron on and enough so you can pull the end with your fingers (sorry for the crappy pick). Keep pulling and help feed the tape under the iron with your other hand (I usually do not need to press the iron I just leave it there and pull the tape.
Jalar suficiente bies para que la plancha pueda ser puesta y suficiente para jalar (lado derecho) con la mano. (Lo siento por la mala foto). Seguir jalando y pasando el bies por debajo de la plancha. Ayuderse con la otra mano para que el bien siga pasando por el pin y la plancha.

And there you have it Bias tape to be bind. (Sorry, I did not make lots of this bias it was for the sewing machine cover top)
Y aquí lo tienen bies listo para poner (lo siento no hice mucho bies de esta tela pues la utilice para la cubierta de mi maquina de coser.) Espero que este tutorial haya sido de ayuda si tienen algún comentario o pregunta no duden en preguntarme.
I hope this tutorial was helpful.
Cheers
Erika


2 comments:
This post helps a lot I also use the metal thingis to make my bias tapes. Just wanted to show you my cardboard casing, it helps attach or sew the bias to the fabric or can be used to sew elastics. Hope it helps!!!
Thank you Estela. it is very helpful
Post a Comment