Friday, March 30, 2012

Little hands

Better known as "manitas" this is for now Miss K's name because she is getting into everything. Her latest work was last Sunday when she got hands on my new face soap that I got just the day before. I could adore her, but I was so mad. Her daddy and her big sis clean up for me. Anyway just a little totally unrelated topic of the day.

The joys of parenthood! Daddy even had the joy of shooting delightful pictures.
Have a great Friday
Erika

Thursday, March 29, 2012

QR Code Wall Hanging Quilt Along: Blocks 9 and Finishing Top

Here is block 9's pattern:
Finished
Finishing Top:

Square up all the blocks. there should be 11"
The order of the blocks are as follows:

when you piece all the blocks together you will have something like this:
Then add to the top the 1" sashing. you can put sides first and top and bottom next. This is the end top, as you see the sashing or border is small enough to make a distinction on the QR Code design:
This is the top finished, Next week I will show you my idea for the back, how I quilted it and how I finished.
Til' then
Have a wonderful Day!
Erika

Friday, March 23, 2012

Elisabeth

We have been so blessed with wonderful women in our lives. One of them is Elisabeth, I met her some 12 years ago and our ties are bigger than life. She has always been a great inspiration to me she and her girls introduced me first to scrap booking and later to quilting. I made my very first quilt with her. We had the opportunity to see her in Idaho for Miss M's birthday and I asked her for a picture with us. I love her, she is amazing.

Erika

Thursday, March 22, 2012

QR Code Wall Hanging Quilt Along: Blocks 7 & 8

Almost done with the top! here Block 7 and 8

Block 7Finished

Block 8
Finished

Have a great Day!
Erika

Friday, March 16, 2012

little Guy's Ties

My Parents are safe home and we are getting back to normal, I usually send presents to family and this time I made something very special for our little guy. He is the youngest grandkid and the only boy. Since is kind of hard to make things for boys I struggle until I found this pattern and I just imagine my nephew. the Ties turn very cute and I made 12! not all for him but for a couple more little guys that still my heart too.
Have a great Day!
Erika

Thursday, March 15, 2012

QR Code Wall Hanging Quilt Along: Blocks 5 & 6

Here you have Block 5 PatternFinished
Block 6 Pattern
FinishedHave a wonderful Day
Erika

Thursday, March 8, 2012

QR Code Wall Hanging Quilt Along: Blocks 2 & 4

Here we are on our third week of this quilt along. Today we are doing blocks 2 and 4. Before I show you the pattern I would like to know if you understood the explanation about how to chain piece the blocks please let me know if not I will prepared a picture tutorial.

Here block 2 Pattern:
Block 2 Finished
Block 3 Pattern:
Block 3 Finished
Have a great Thursday!
Erika

Wednesday, March 7, 2012

Enjoying Grandparents

It has been two weeks since mom and dad arrived to our home it has been great! Last weekend we all went to Darlette's place to celebrate the baptism of miss MC into our Church. I got this picture of my mom enjoying the grand kids at the supermarket. They are like bees with honey (and she loves it!)
Tomorrow I'll posts Blocks 2 & 4 of the quilt along, Stay tuned!
Erika

Thursday, March 1, 2012

QR Code Wall Hanging Quilt Along: Block 1 & 3

Blocks 1 and 3

These blocks are the same design so it is really one design today for two blocks.

First of all here is the pattern

You will need 33 main fabric squares (black) and 16 background squares (white)

Now to sew them as a chain and save thread I will show you a technique Darlette taught me whilst making the Tokyo Subway Map quilt.

Place your squares on the table according to the block pattern. You will count your columns 1 to 7

Place column 2 on top of column 1

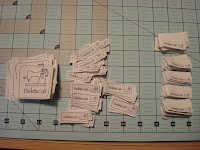
Sew on the east side of the squares first row G, then F, E and so on sew chain one by one closely. Do not trim. Press to one side and you will have something like this:

(Here I have made three columns) Imagine just with 2. Then sew column 3 each to every row and press to the other side.

You are not clipping any rows. Sew each column to each row until you finish all the columns and you will end with 7 rows connected.

Start sewing each row and you will end with your first block.

Repeat.

Congratulations you have done your first 2 blocks! You will have something like This:

Happy Sewing!

Erika