Showing posts with label moda fabric. Show all posts

Friday, April 13, 2012

Scripture Cover and Bag

Since the end of March we have seen the miracle of reading, yes that magical thing that happens sometime in Kindergarten and first grade. We have been working with miss A all the school year and it finally happened. While visiting Darlette we were reading the scriptures and it was miss A's turn and I told her to try to read and she did. She was so happy and excited that she wanted to keep trying, the next few days she got more excited about reading and I told her if she wanted to have her own scriptures, She said yes! so did miss G so I gave them each her own and I promise to make them a tote to take to Church. I was a few days late from Easter, but since I did not said it was their Easter resent it work out Okay.
I also decided to make them a book cover. I took the girls to the quilt shop and I let them choose one print (they both chose the hot pink fabric) and I complemented them with two more prints.


Happy Sewing

Erika 

Monday, January 16, 2012

Sewing Machine Cover

Have this happened to you? You want to make something very special but you are afraid you are going to hate it if you do. This is what happened to me every time I thought about making a sewing machine cover. so I thought and I thought and the idea came in black and white and later evolved to this:
I got the bunny Hill fabric as a scrap piece it was enough to do this. I just love it! with all my previous circle quilting practice on my last project I was kind of confident to try to do this flowers like Laurraine Yuyama that I love. Then as I was looking on her Flickr site i found that by cover has some of her influence. To each flower I added a button to make it different.
I do not think I will get tired of it, but if i do, I just turn it outside in and I'll get a totally different look.
Cheers,
Erika

Saturday, November 19, 2011

Believe Banner

How ironic my last project took me 3 years to finished and this only 3 hours. Today it was super Saturday in my Church and we had several projects going on. I choose the banner. The sample had the Sweetwater girls, but since I am doing my Christmas decorations more focus on what Christmas is really about. I decided to go with a different line of fabric, I went with Fa la la la la, from Moda French General. At first I was afraid I wont like it but it is official I am a French General gal. I think they fit my style. I just love it and the fabric is not to Chistmas-y.

Que ironico mi ultimo projecto de ayer me tomo 3 anos en terminar y este solo tres horas. Hoy hubo un Super Sabado en mi Iglesia e hicimos varios projectos, yo decidi hacer este banner, es super sencillo. El ejemplo que tenian estaba hecho con la linea de las chicas de Sweetwater pero como he decidido hacer mis adornos mas enfocados en lo que la navidad realmente representa decidi irme por la linea de las chicas de French General, su linea de navidad Fa la la la la. Al principio no estaba muy segura si me hiba a gustar pero ya es oficial me encanta su estilo y es el mio. La tela no es muy navidena pero funciona perfectamente bien. Por cierto aveces no tengo el tiempo de escribir el blog en Ingles y Espanol y tomando en cuenta que tengo un traductor en uno de los lados... bueno gracias por comprenderme.
Saludos.

Erika

Thursday, November 10, 2011

Nativity Wall Hanger


I made this wall hanger with the idea of having a window into that sacred scene when our Savior was born. I tried to buy a panel, but I really did not find anything, so I decided to make it by myself.
Hice este acolchado para la pared conla idea de tener una ventana a la magica y tan especial escena del nacimiento de nuestro Salvador. Trate de conseguir un panel pero no encontre nada, asi es que decidi hacerlo yo misma.

I started by looking for a nativity siluet. Then I try to design some kind of fame or window looking design. I got some ideas at Debbie Mumm's books I have for reference. Empeze buscando una silueta de un nacimiento. Despues trate de disenar un marco o ventana para la silueta. Encontre inspiracion en uno de los libros de Debbie Mumm.
I used Reindeer Games by Sandy Gervais. I loved the line and I wanted more the problem was that I got the fabric in a place quite far away from me and I thought my local Shops will have some. The surprising thing was that none of the 3 shops I visit didn't even received the line It was sold out before left the factory! Crazy. Use la linea de telas Reindeer Games de Sandy Gervais. La linea esta muy linda y queria mas el problema es que la compre en un lugar a donde casi no visito y pense que en las tiendas que siempre voy encontraria facilmente. Cual ha sido mi sorpresa que en las tres tiendas que fui nisiquiera la recibieron resulta que se habia agotado desde antes de que saliera de la fabrica!
I wonder why they make limited production. Some lines are really successful and I wish they could reprint them.
Me pregunto por que hacen una produccion limitada. Algunas lineas son muy populares y desearia que las reproducieran otra vez.
The start print is from Benatrex fabrics at first I was afraid it could be to bright but it really turn out great.
La tela de estrellas es de Benatrex, primero no estaba segura si estaba muy brillante pero ya despues me usto como se ve con el resto de las telas.
The quilting process was tedious I wanted to have a special design but it was hard to come with the whole combination of designs. I stipple the sky, I stitch in the ditch the red frame, I "X" quilt the green of the frame border, stitch in the dich the black border and I did some holly and berry designs for the last border.
El proceso de acolchado fue un poco tedioso, queria tener un diseno especial pero me fue dificil combinar todos laos disenos. el cielo fue stipple, acolche a la orilla de toda la tela roja que hace el marco y la parte verde hice un simple X. para el marco negro tambien lo acolche en la orilla y para el ultimo borde decidi unas hojas santas con moras.
I love the fact that Sandy makes bias look fabric that I do not have to cut on the bias yay!
The quilt mesures 24"X 26" and the blue center 11"x13".
Me gusto que Sandy hace tela para lucir como bies asi no tengo que cortar la tela al bies y que bueno no me gusta ese proceso. El acolchado mide 61 cm por 66 cm yla parte azul 28 cm por 33 cm.

Have a Great Day!
Erika

Sunday, June 12, 2011

Miss G

Miss G turn 4 this weekend. Last Friday I started sewing a Hat for her using this tutorial. I bought enough material to make for all girls using Sweet Water fabric; the other material was a repurpuse a kaki skirt that I ruined with a highlighter. Miss G saw the material and asked me "mommy are you making me a dress too" So I felt very obligated to make her a dress. so here is the result:
Miss G cumplio 4 anos este fin de semana. El viernes pasado empece a hacerle un sombrero usando este tutorial. Compre suficiente tela para hacerles a todas sombreros, use tela de Sweet Water un rosita muy lindo con estrellas, la otra parte del sombrero es tela que reutilice de una falda de lona que se me aruino con un marcatextos. Cuando Miss G me vio cosiendo me pregunto si tambien le iba a hacer un vestido. asi es que me vi obligada a sacrificar mi projecto para hacer a una linda nina feliz y esto es lo que salio:
I love the picture Miss G had no problem posing for me!
Me encanta la foto Miss G no tubo problema en posar para mi!

Have a great day!
Erika

Saturday, January 29, 2011

A Birthday Dress

Missy is having a B-day next week and that makes me so busy I will show you the party pictures after all done. For now I want to show you a dress I made for her... She actually likes it. Crazy Girl.

I use what I had in hand so no expend on it. The black fabric is wool, and cotton for the app and ruffles at the bottom. The pattern is a Simplicity 5284.

Mi pequeña cumpleanos la proxima semana y eso me ha mantenido bastante ocupada, luego les enseño fotos despues que termine todo pero por ahora les quiero mostrar un vestido que le hice. Ahora si dijo que le gusto. Locuras de ninos.

Use lo que tenia a la mano asi que no gaste nada en el. La tela negra es Lana y para las aplicaciones y la tira de abajo use algodon. El patron es Simplicity 5284.
Have a nice weekend.
Que tengan bonito fin de semana

Darlette

Friday, January 21, 2011

Planning


I've been planning how to best use the bliss charm pack Darlette gave me for Christmas. This is one part of the process I really love.
Have a great Weekend
Erika

Tuesday, December 14, 2010

Mini quilt

Last week I made this cute mini quilt for my future nephew. I used some brown and blue minky, and part of a charm pack from Lily and Will by Moda. The pink fabric will be for a mini quilt for KayLee.
La semana pasada hice este mini acolchado para mi futuro sobrino. Use cafe y azul de una tela de punto y parte de un charm pack de la line Lily and Will de las telas Moda. Las telas rosas seran para una colchita para KayLee.
To be honest I did not like working with a mix of knits and cotton it was a pain, but the end result is worth the battle. I quilted it using the lollipop design by Leah.
La verdad es que no me gusto mucho trabajar con la combinacion de la tela de punto y el tejido plano de algodon realmente fue una batalla, pero el resultado bien valio la pena. Lo acolche usando el diseno de lollipop de Leah.

Saludos,
Erika

Sunday, December 12, 2010

Cosey's Quilt

1 Done and 3 to go.
I'm done with Cosey's Quilt I use this tutorial and then I modify it to fit a full size bed.

Uno terminado y tres mas por hacer.
Ya termine le acolchado de Cosey. Use este tutorial y solo lo modifique un poco para que cubriera una cama matrimonial.

Please don't look to close to my quilting I'm still learning.
Porfavor no se fijen mucho en mi acolchado porque sigo en el proceso de aprendizaje.

Good thing Cosey loved it. Even do she needs to wait 'til Christmas
Lo bueno es que a Cosey le encanto. Aunque tenga que esperar a Navidad para usarlo.

Have a wonderful Day
Darlette.

Thursday, October 21, 2010

A lunch bag for Alana

This week has been a hard one. On Monday I spend all day cleaning after family visit. just to end the rest of the days cleaning after my girls illness. washing sheets twice a day is not my idea of spending my day. Grace was first on Tuesday and last night was Alana's turn. Is not fun to have sick kids.
Do you remember this post? I love it so much that Darlette offer me to make one for Alana's b-day if I give her all the material, so I got the material from the new Bliss from Moda. The green is Kona solids.
Se acuerdan de esta entrada? Me gusto tanto que Darlette me ofrecio hacerle una lonchera a Alana para su cumpleanos si le compraba todo el material, asi es que le compre de la nueva tela Bliss de Moda.
Our Alana is 5 now and ready for school (too bad we have to explain to her that she has to wait 10 more months :( !) Nuestra Alana ya tiene 5 y esta lista para la escuela lo malo es que tubimos que explicarle que tiene que esperar 10 meses para ir. :(
Happy Fall
Erika

Monday, September 27, 2010

Candy Corn Table Runner: Day 5

The last Day yay! How was your weekend? Mine was full, and I did not finish my runner until a couple of minutes ago. It is hard with three little girls at home. When I think I will be done in an hour it becomes 3 of 4 hours later. Well this is Motherhood And I won't change it.
El ultimo dia yea! Como les fue de fin de semana? El mio estubo muy ocupado, no termine mi camino de mesa sino hasta hace unos minutos. Es dificil con tres pequenas en casa. Cuando pienzo en que algo me tomara una hora termina siendo tres o cuatro. En fin eso es la maternidad y no la cambio por nada.At this moment we are done with our quilting.The picture above is about finishing the edge margin.
Para este momento ya terminamos de acolchar. La foto de arriba es de cuando terminaba la orilla del segundo margen.
Now is time to trim the excess batting and backing. I keep thescraps to use as fillers.
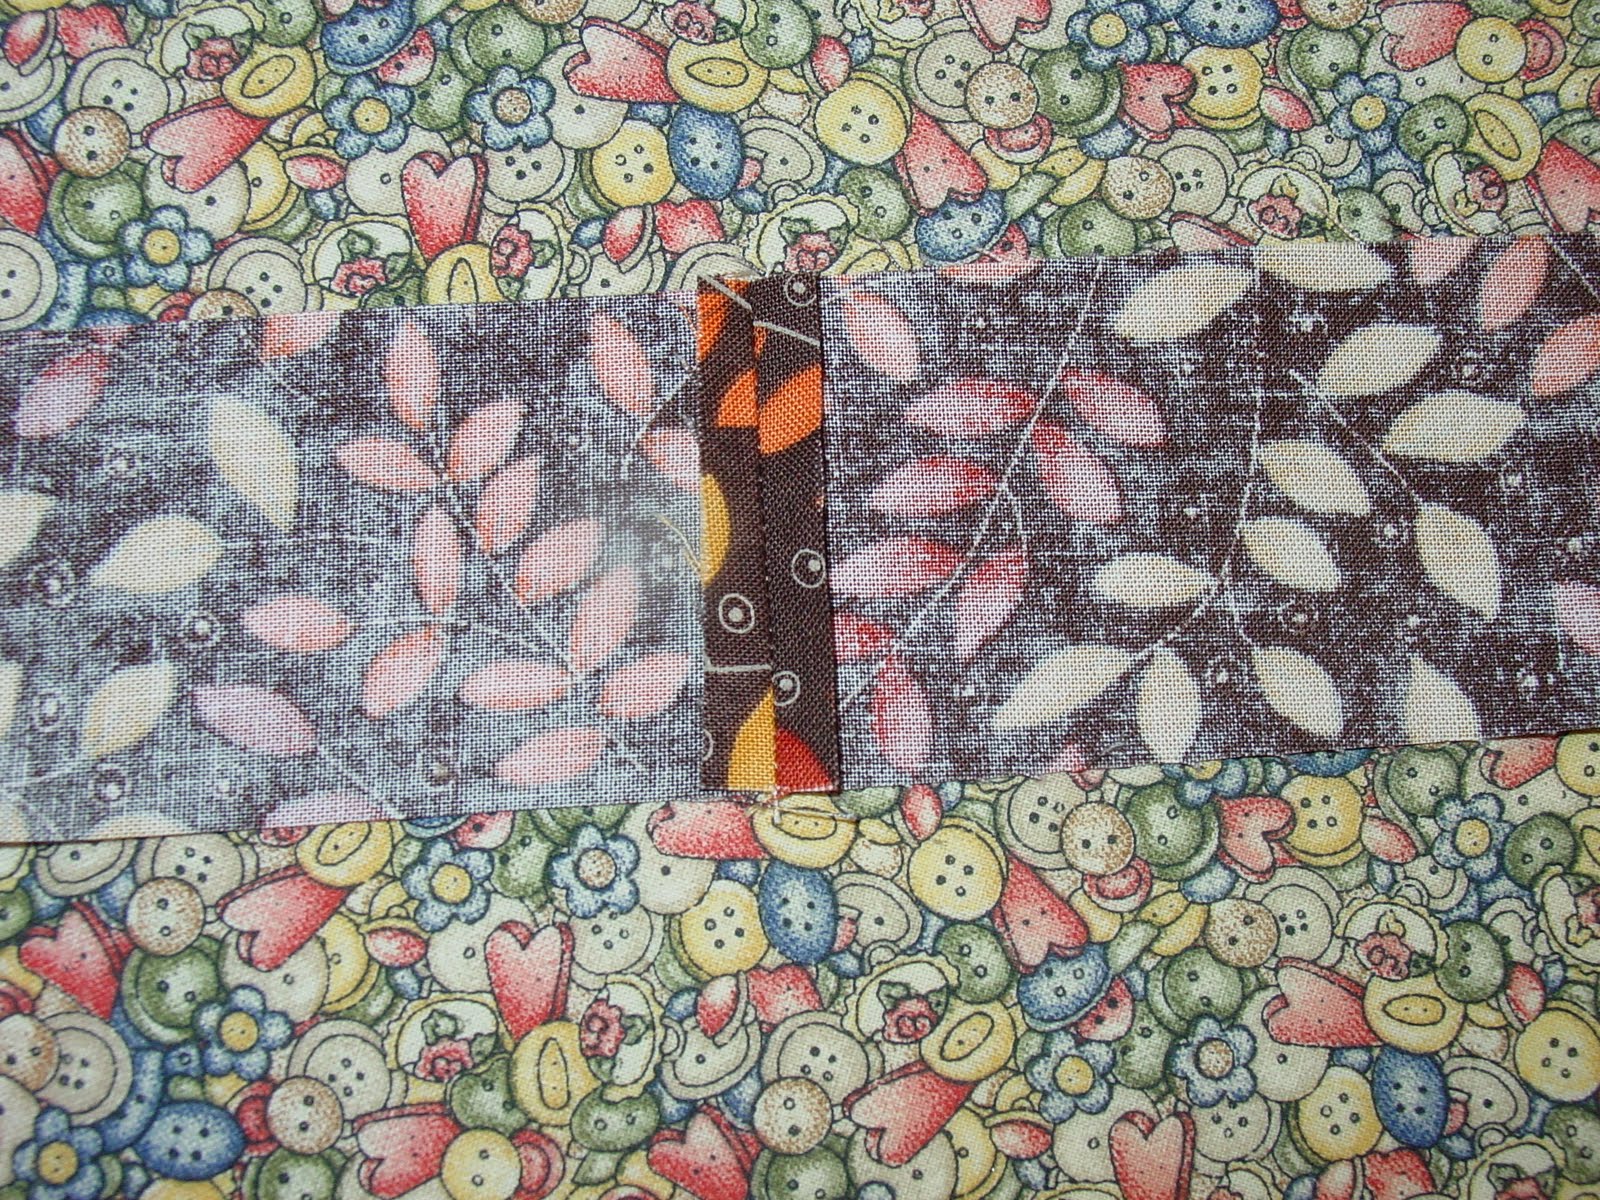
Ahora es momento de cortar el relleno y la tela trasera. Guardo los retazos para ocuparlos despues como relleno
I will just show you a trick of how to make the bias tape.
Solo les mostrare un tip para hacer el bies.
Cut your pieces 2 1/2"and sew them right sides together, press and do not forget to open press the seams. I did use 3 strips. I just realize we did not needed so much of this material but you can always use it for the backing I will change the amounts later.
Cortar las piezas a 5.4 cm de ancho coser con la parte derecha juntas, planchar y no olvidar planchar las costuras hacia afuera.. Yo use 3 tiras, y ahora me he dado cuenta de que no se necesitaba mucho de esta tela en fin tendre que cambiar las cantidades.
Fold in a half with your hand.
Doblar a la mitad con la mano.
Now put a pin on your pressing table pinned a little bit on the bottom croos to the 1 1/4" space and pin again like the picture above.
Ahora poner un alfiler largo entre el bies 3.2 cm como se muestra en la foto de arriba y asi pasara el bien doblandose facilmente.
Place the iron after the pin and leave enough material so you can pull the bias on the right side (if you are right hand sided). The bias tape will fold with no effort and you will be done in no time.
Poner la plancha despues del alfiler y dejar suficiente tela para poder empujar la tela del otro lado si son diestras. El bies se doblara automaticamente y sin ningun esfuerzo y terminaran rapidisimo.Ready to add the bias. Here is an excellent tutorial.
Listas para poner el bies. Aqui pueden encontrar un tutorial excelente. Done!
Listas hemos terminado!Do not forget to label it!
No se les olvide firmarlo!
I hope you like this tutorial, It was fun to make it together. I hope you got something useful for your crafting. The next post will be a series of seven posts showing you a project Darlette made for mom. I hope you can visit us. 'till then...
Espero que les haya gustado el tutorial, fue divertido hacerlo juntas. Espero que hayan encontrado alguna nueva forma de mejorar sus acolchados. La siguiente entrada empezaremos una serie de siete entradas mostrando un projecto que Darlette hizo para mama. Espero que nos visiten. Hasta en tonces...
Happy quilting
Erika

Friday, September 24, 2010

Candy Corn Table Runner: Day 4

Okay, I almost do not make it today, but here we are ready to go.
First of all I am going to show you how to hide the upper thread: On the picture above you can see the beginning of our machine stitch and we are going to hide it on the wrong side of the fabric.
En la foto de arriba se ve el hilo de costura que vamos a esconder en la parte de atras. Facing the wrong side of the fabric pull a little bit the bobbin thread, enough to see a little loop (which is the top thread)
Viendo la tela por la parte trasera jalar el hilo de la bobina un poquito, lo suficiente para ver un pequeno lazo (que es el hilo de arriba)
You can see the loop I hold with the pin and then pull it out.
Con un alfiler jalar el lazo y sacarlo.
You have now the two threads on the same side and you can tide a knot and cut the excess. You can do the same when you start quilting you bring the bobbin thread up, you leave it out till you are all done with your quilt and then with a hand needle you hide them in between the quilt sandwich.
Ahora tienen los dos hilos en el mismo lado de la tela, ahora pueden hacerle un nudo y cortar el resto. Este metodo tambien se puede usar para cuando uno comienza a acolchar se hace al reves, ponemos el hilo de la bobina hacia arriba y dejamos los hilos hasta que terminamos de acolchar y despues los escondemos entre el sandwich del acolchado con una aguja para coser a mano.
Now that we applique all the pieces we are ready to prepare the runner to quilt:
Ahora que nuestros appliques estan listos podemos comenzar a preparar el camino de mesa para ser acolchado.
We are going to make our quilt sandwich cutting a piece of batting of your preference (I use Warm and Natural). Cut it two inches bigger than your TR (14" by 46"). Now lay the two pieces (batting and top) on the backing and cut it again two inches bigger (16" by 48") This is with the intention of not running out of fabric when you quilt it and everything is covered. In this case it will be one and two inches from the top edge because is a small piece, if you are making bigger quilts 3"-5" are recommended.
Vamos a hacer el sandwich para acolchar cortando una pieza de relleno de su preferencia (yo use Warm and Natural) Cortarlo cinco cm mas grande ue nuestro camino de mesa osea (35.5X 115cm). Ahora poner las piezas de relleno y el top en la tela para atras que igualmente sera cinco centimetros mas grande (40.5X120 cm). Esto se hace para no nos falte tela a la hora de acolchar que muchas veces la tela se jala y podemos terminas sin suficiente tela trasera o relleno. estas medidas son para acolchados pequenos pero para acolchados grandes se recomienda incrementar el exceso de tela de 7.5 a 12.5 cm.
Next is the pining, I pin about 4 to 5 inches apart You can also spray baste. I did it all on my table because the runner is small and does not require the usual battle to keep it all straight.
Ahora es el turno de los seguros los he puesto de 10 a 12 cm de espacio, tambien se puede usar el spray para asegurar. Todo esto lo he hecho en mi meas de trabajo, pues con una pieza tan pequena no tenemos que batallar como con los acolchados grandes para mantenerlos lisos.You are now ready to have fun quilting! I try to edit my pictures to show you some ideas of how can we quilt this runner, but it did not work so I ended with my second best option the white board:
Ahora estamos listas para divertirnos acolchando! Trate de editar mis fotos para mostrarles algunas ideas de como acolchar el camino de mesa, pero no me funciona asi es que use mi segunda mejor opcion, el pizarron blanco.I mention I am going to make a double margin on the edge on my quilt at 1" and 1 1/2" from the edge of the runner. On the above picture I marked the double margin and then a stippling all over the piece except the applique area. I did mention yesterday that even if you do not have a quilting foot you can do the free motion quilting by removing the presser foot and lowering the feed dogs. I know Darlette has done it before and it works. just practice before you start so your tension is right.
Mencione antes que pondre un margen doble de 2.5 cm y 3.75 cm alrededor del camino de mesa. La foto de arriba muestra el margen y el diseno stippling por todo el camino de mesa con exepcion de los dulces de maiz. Ayer mencione que se puede hacer acolchado libre sin tener el pie para hacerlo, simplemente remover el pie de costura y bajar los dientes de arrastre. Se que Darlette lo ha hecho y funciona, solo deben de practicar antes para ajustar bien la tension.
This second one is just about making echoes on all over the candy corn, you can also do an echo spiral it looks beautiful and this one you can make with a normal foot using the edges of the foot as guidance for a straight distance between ecoes.
Este segundo diseno es simplemente hacer ecos alrededor de lo appliques, luce muy lindo. este tipode acolchado tambien se puede usar con pie normal y usando la orilla del pie puede uno guiarse para mantener la distancia entre los ecos.
This next one is a combination, making two or three echoes and the rest filling with stippling.
Este siguiente es una combinacion de dos o tres ecos y el resto rellenarlo con stippling.This next one is about one echo or just quilt on the edge of the applique and the rest straight lines all over also sutable for normal foot.
Este siguiente es un eco o acolchar alrededor del applique y el resto lineas rectas, este tambien es un diseno en el que se puede usar un pie normal.
This last is a last minute inspiration combining stippling with little candy corns I think I am going to use it I do not know. You will see the finished product on Monday when I sow you the finish runner. till then...
Este es mi inspiracion de ultimo momento combinando stippling con unos pequenos dulces de maiz, creo que asi lo acolchare pero todavia no me decido, ya veran como me queda el Lunes que regrese para mostrarles mi camino de mesa terminado. ahasta entonces...
Make it a great weekend!
Erika